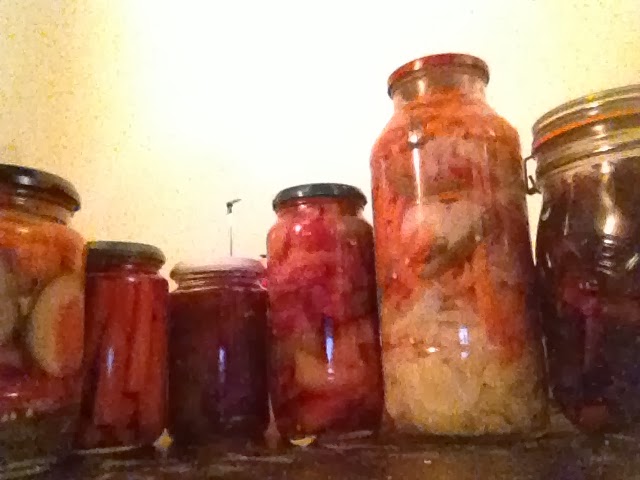
... and red cabbage, white cabbage, still more carrots, half a cucumber, two capsicums, red chillies, green chillies, onions and an entire swede became a diverse array of different pickles!
The "pickle everything in the fridge before going away" has worked reasonably well for me once before, but this time I wanted to make sure they would last a while since even with my love of pickled things, it might take me some time to get through this quantity. Recipes often emphasise the importance of sticking to the correct quantities of known-acidity vinegar and salt in order to preserve pickles safely, but frustratingly don't always provide a generalised guide as to what the proportions should be.
I found one recipe specifying a 1:1 mixture of 5% vinegar and brine (made with 1 cup salt per gallon of water) for final concentrations (before allowing for vegetables releasing liquid) of 2.5% vinegar and about 1/8 cup salt per litre; and another saying "6 cups of water, 3 cups of vinegar and 1/2 [presumably 1/2 a cup] pickling salt", which is slightly under 1/4 cup salt per litre. Not knowing the concentration of my vinegar, I decided at first to go for a 2:1 rice vinegar:water mix with a scant 3tbs salt in 3 cups of liquid (the salt ratio of the second recipe). I blanched the red cabbage for a few minutes and used the water in the pickling liquid, which I simmered with star anise, peppercorns and cloves -- but on tasting, it was WAY too salty! I added another 1/2 cup each of water and malt vinegar and 3/4 cup sugar; it was still on the salty side but better. Half a head of red cabbage made the large jar shown at right. I suspect when using it I may rinse it, or use it in dishes without added salt, or mix it with fresh in order to dilute the saltiness.
The leftover red cabbage pickling liquid was a deep purple colour, so I thought I'd make some pickled carrots (I had a LOT of carrots; the 1.5kg bags were 69p the week before Christmas) -- second from left. I cut them into sticks in order to squeeze as many into the jar as possible, and then simmered them in the pickling liquid for about five minutes before bottling. Next up were a couple of bottles of mixed vegetable (cucumber, carrot and chilli; and cabbage, carrot and chilli), using rice vinegar and ginger; and then the pickled peppers, with most of the red and green chillies, yellow and green capsicum, and some sliced red onions. There was enough pickling liquid left for a jar of pickled red onions with stray chilli bits too.
That still left the swede. Now, swedes are fairly dense and hard, so I thought that shaving them into thin slices with my peeler-slicer would be a good start. Then I got thinking about thinly sliced other sorts of pickles, like radish, and the next thing that came to mind: kimchi! A bit of googling revealed that turnip was a fairly common kimchi choice, and that virtually anything could be kim-chied. The first step was to peel the swede, cut it into manageable sections and then slice into fine cross-sections. These were sprinkled with 2-3tbs salt and mixed thoroughly then left to stand for a few hours. Some recipes say rinse, others don't (and vary the salt accordingly -- 2tbs salt to about 2lbs vegetables was a common don't-rinse proportion); I went for a compromise of rinsing once in a measured amount of water (3 cups, which would result in a brine as concentrated as that recommended by the second pickling recipe) and then draining thoroughly. A taste test indicated not too salty, not too bland.
For the rest of the mix, opinions were divided on the effectiveness and authenticity of using gochujang (chilli paste) rather than gochugaru (chilli powder) but the former was what I had, in exactly the right quantity to use up for this size batch -- about 1/4 cup. Following another recipe, I blended up half a red onion and half an apple; garlic is also usual and the importance of ginger is stressed, but I had none left of either so I threw in a few scoops of pickled ginger instead, and a slosh of vinegar. Mixed all together, this looked like a promising start to kimchi and tasted pretty good as well.
I packed the mix into a couple of jars, pushing it down tightly -- I think this is to remove air spaces and allow the anaerobic fermentation to take place. Apparently after that kimchi just looks after itself, usually at room temperature for a day or two to begin fermentation before cold storage for a week or two, but I put mine straight in the fridge as I was going to be away and had visions of it coming to life and escaping. I left the lids on loosely to allow some room for fermentation -- if it expands too much, at least the jars are sat in the (now empty) crisper drawer and won't overflow everywhere! We'll see what it's like in a few weeks' time...


No comments:
Post a Comment